List view
Quick Start
Quick Start
User Guide
User Guide
Policies & GuardRails
Policies & GuardRails
Witness Anywhere: Remote Device Security
Witness Anywhere: Remote Device Security
Witness Attack
Witness Attack
Administrator Guide
Administrator Guide
Deploying on macOS (Beta) with Jamf
Note: Witness Anywhere for macOS (Beta) using Jamf cannot route traffic from Safari browser and Microsoft thick client apps (Ex: Word, Excel) to WitnessAI Proxy.
Generate PAC Token & Download Files
- As a User with Admin Role or above, log into the WitnessAI Console.
- Click on the Settings menu item (1), then click on Proxy Configuration in the sub-menu (2).
- Enter a name in the Key Name field (3).
- Choose an Expiration Date (4).
- Click the Generate PAC Token button (5).
- Locate the row in the list with the Key Name and Expiration Date of the PAC Token you created (6), and click the Download Symbol.
- Click on Jamf (Mac) (7) from the dropdown, and a zip file will be downloaded to your Downloads folder.
The downloaded file will have a name similar to: 1227db3823fcc1c7cd1db6cc3ed0c5cc1c7cd1da15c5b50a5b.zip.
It will uncompress to a folder of the same name, containing three files:
register_device.sh: A bash shell script to register the user device with Witness Anywhere.
pac_profile.mobileconfig: A configuration file to upload to Jamf to configure the proxy settings.
flush.sh: A bash shell script to deregister the user device and update Jamf.
Configure The Extension Attributes
- In the Jamf Portal, Navigate to Settings > Computer Management > Extension Attributes.
- Click on New, input the values below, and click Save.
Ensure the box labeled “Enable (script input type only)” is checked (1).
Display Name: Witness_PAC_URL (2).
Data Type: String (3).
Inventory Display: Hardware (4).
Input Type: Script (5).
Script (6):
#!/bin/bash
pac_url=$(xmllint --xpath "string(//key[.='pac_url']/following-sibling::string[1])" /Library/Preferences/com.witnessai.settings.plist)
echo "<result>$pac_url</result>"
- Click on the Witness_PAC_URL Extension Attribute entry and open it.
Make a note of the ID number at the end of the URL in the Address Bar.
In the below image the ID number is 1
Example: https://{company-name}.jamfcloud.com/view/settings/computer-management/computer-extension-attributes/1
Configure The Registration Script
- In the Jamf Portal, navigate to Settings > Computer management > Scripts and Click on New.
- Enter the details below and click save:
- Display Name: Witness-PAC-Registration
- Paste the downloaded register_device.sh script under the script tab.
- Configure the Computer Group
In the Jamf Portal, navigate to Computers > Smart Computer Groups and click on New (1).
- Enter a Display Name (Ex: Witness-PAC-Devices) (1).
- In the Criteria Tab (2), Click on Add
- Choose Witness-PAC-URL (1) from the list.
- Input the Values Below for Criteria Section and Save it.
Operator (1): like.
Value (2): https://api.{tenant-id}.{region}.witness.ai/v1/peas/pac
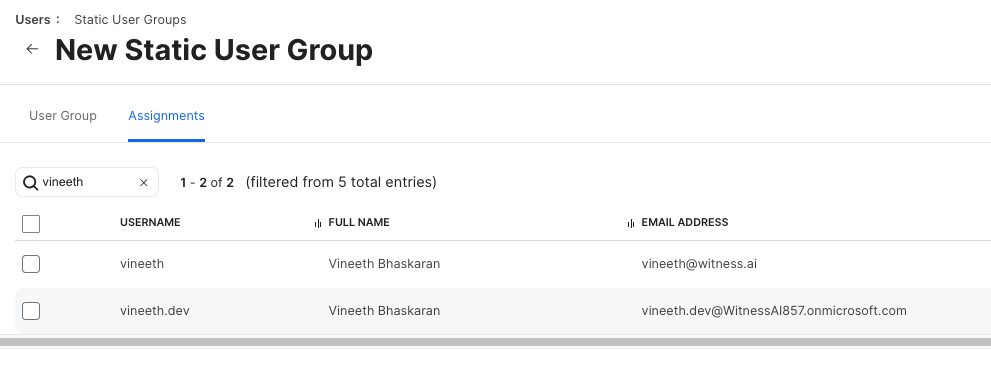
Configure The User Group
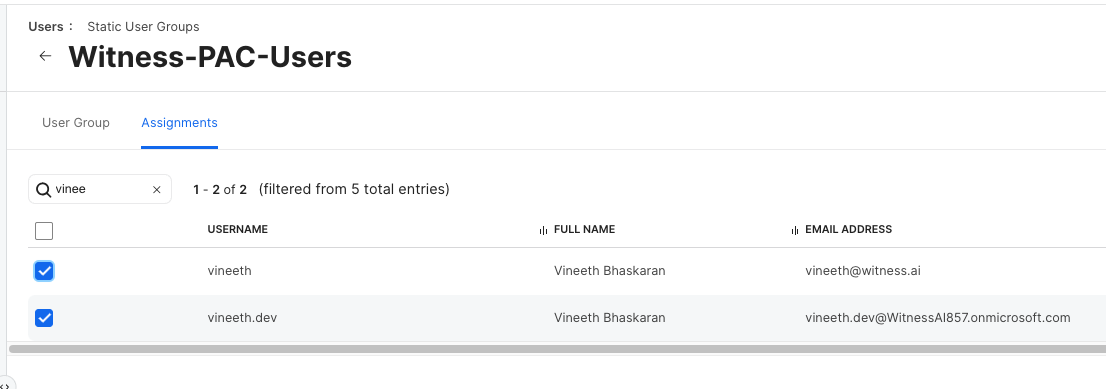
- Navigate to Users > Static User Groups and click on New
- Enter the Display Name of the group as Witness-PAC-Users
- Under the Assignments tab, filter and select all the required users.
Configure Policy to push the Registration Script
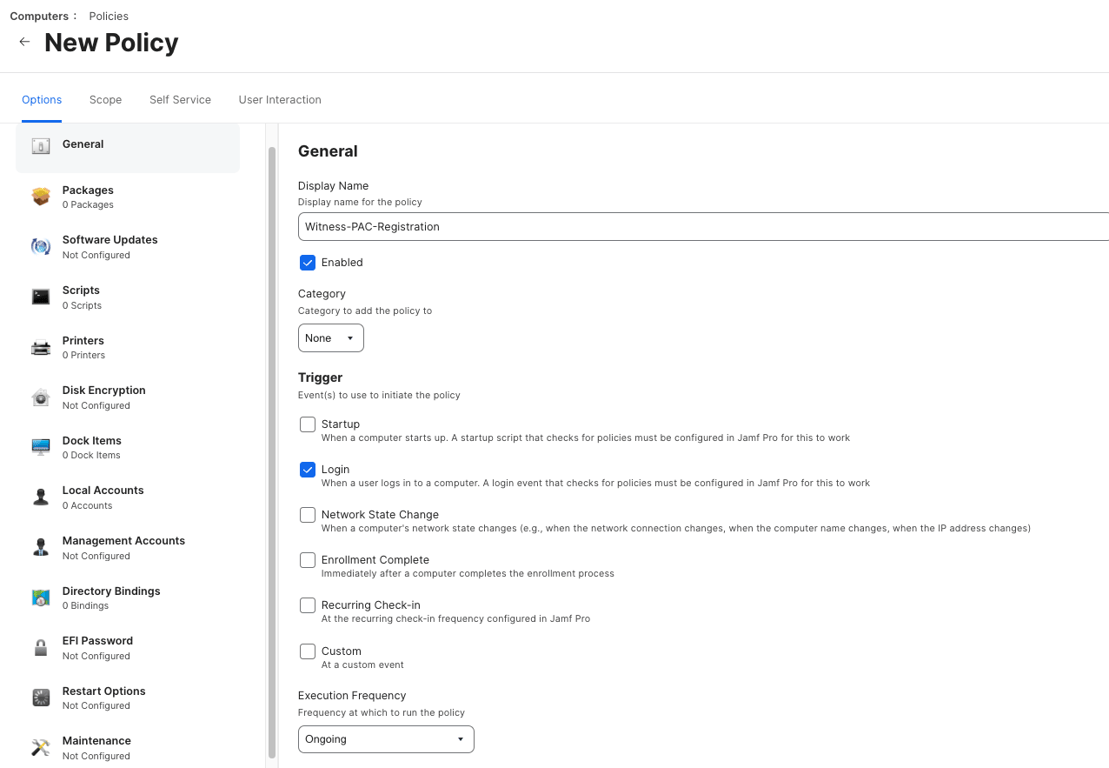
- In the Jamf Portal, Navigate to Computers > Policies and click on New
- In the General Section:
- Enter the Display Name (1) as Witness-PAC-Registration.
- Trigger: Check the Login checkbox (2).
Note: A login event that checks for policies must be configured in Jamf Pro for this to work
- Login Event Configuration
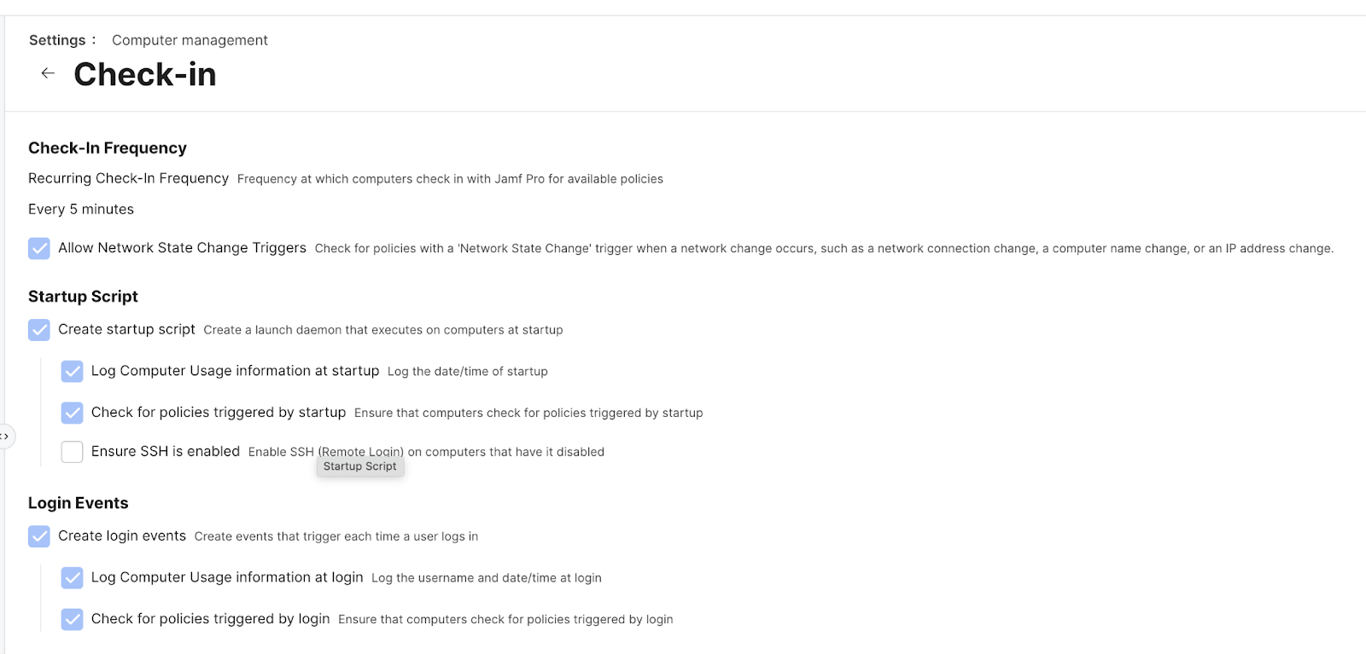
- Navigate to Settings > Computer management > Check-in
- Click on Edit and Check the below items:
- Create login events
- Check for policies triggered by login
- Execution Frequency: Ongoing
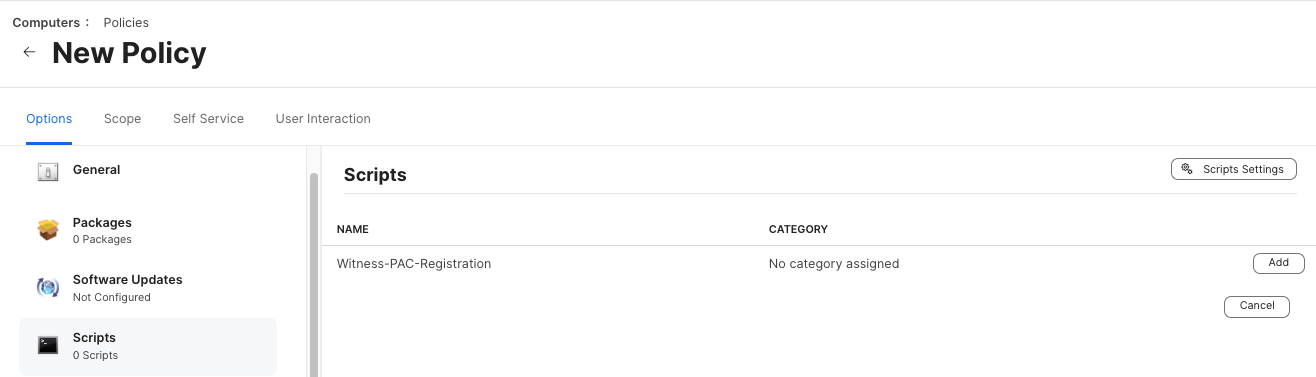
- Click on Scripts Section Under Options and then Click on Configure.
- Click on the Add button for Witness-PAC-Registration Script.
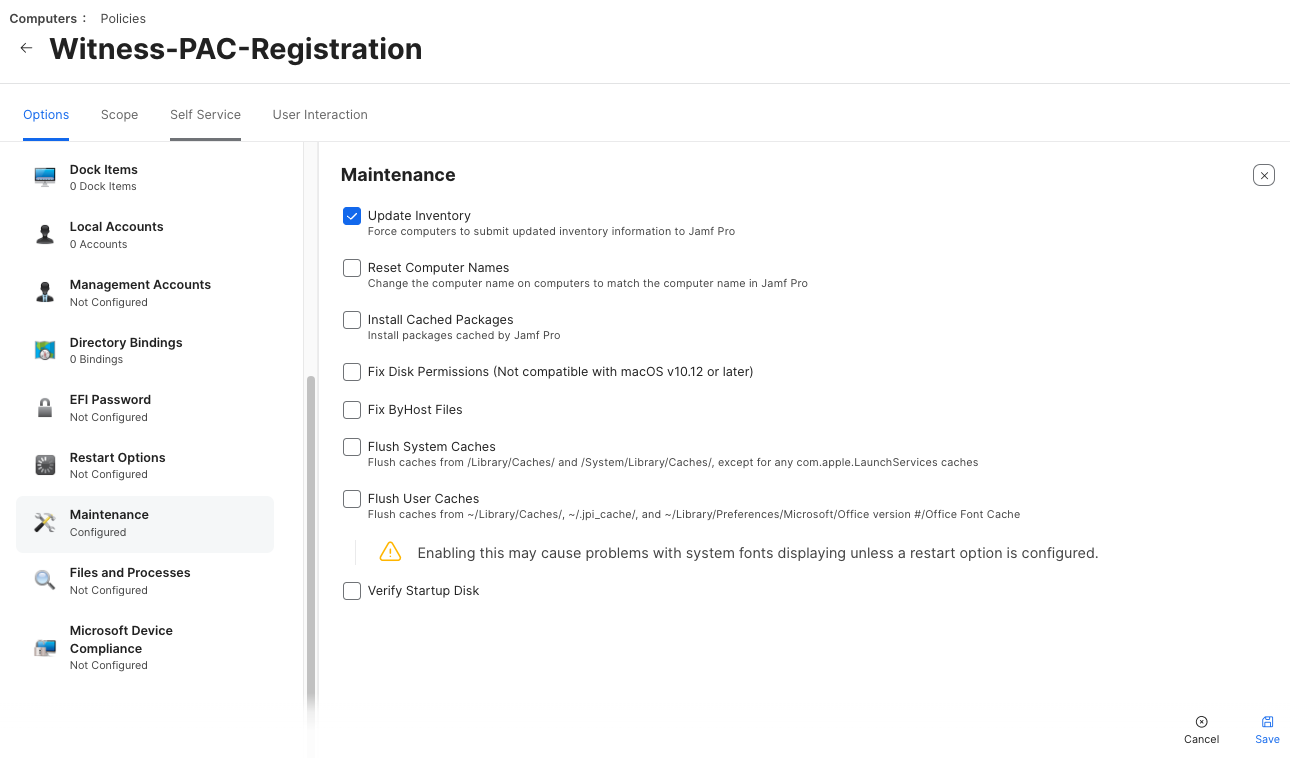
- Now Click on Maintenance Under Option and Click Configure
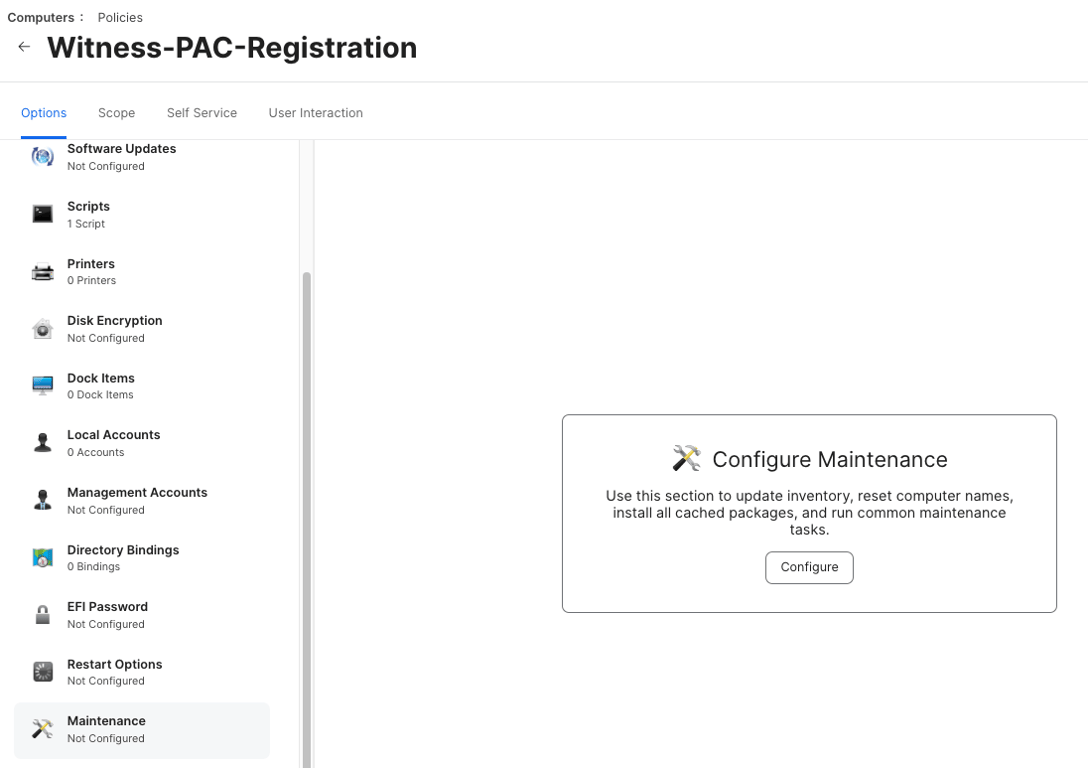
- Make sure Update Inventory is selected.
- Now Click on the Scope Tab on the Top and click on Add
Select User Groups and Add the Witness-PAC-Users group and click Save.

- The registration script will now be pushed to the target macOS devices and will be run during next device login.
- PAC URL Storage: After successful registration, the PAC URL will be stored in a plist file on the client machine located at:
- /Library/Preferences/com.witnessai.settings.plist
- The PAC URL is persisted in the plist file to ensure that it is available for further configurations.
- Upload Mobileconfig File to Jamf
- Navigate to Computers > Configuration Profiles and Click on Upload
- Now choose the mobileconfig file, downloaded in Step 1 from the UI and upload it.
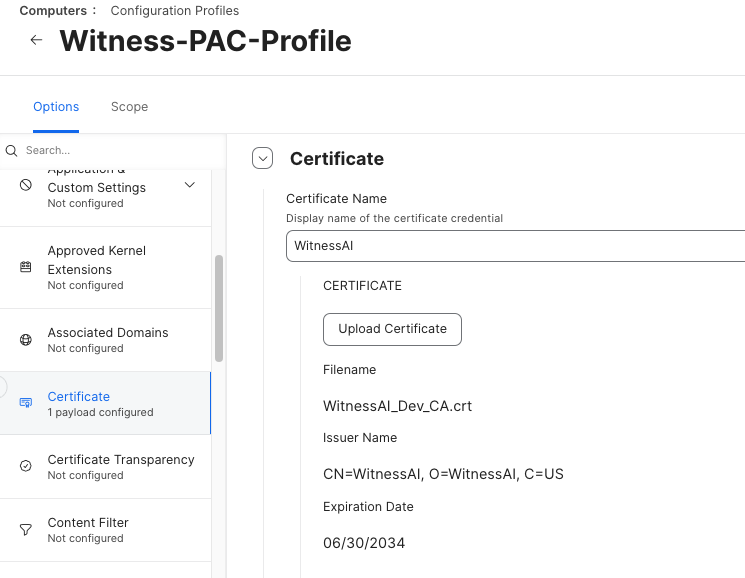
- Go to Certificate Tab and Ensure that you see the Proxy CA Certificate details.
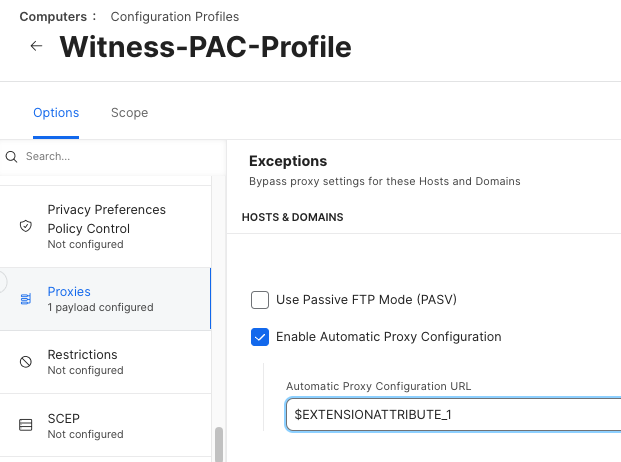
- Select Proxies under Options and replace the Extension Attribute ID number with the ID number obtained in Step 2.
- Now go to the Scope tab, then Click on Add and Select Witness-PAC-Devices under Computer Groups.
- Now save the configuration.
In this example the ID number obtained in Step-2 was 1 and hence the value for Automatic Proxy Configuration URL is set as $EXTENSIONATTRIBUTE_1
Ex: If the ID value obtained in Step 2 is 16, the value here should be $EXTENSIONATTRIBUTE_16
- Verification
- During the next user logon, the registration script will run on the device.
- If the Username/Email is present in the Witness AI Console, the registration will be successful.
- The logs for the registration script will be stored at /tmp/pac_registration.log on the device.
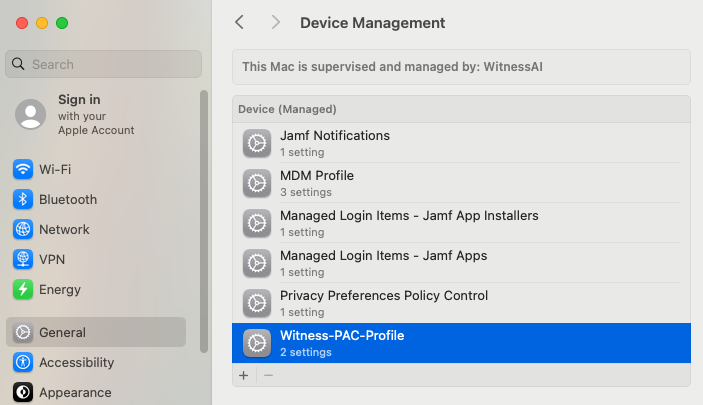
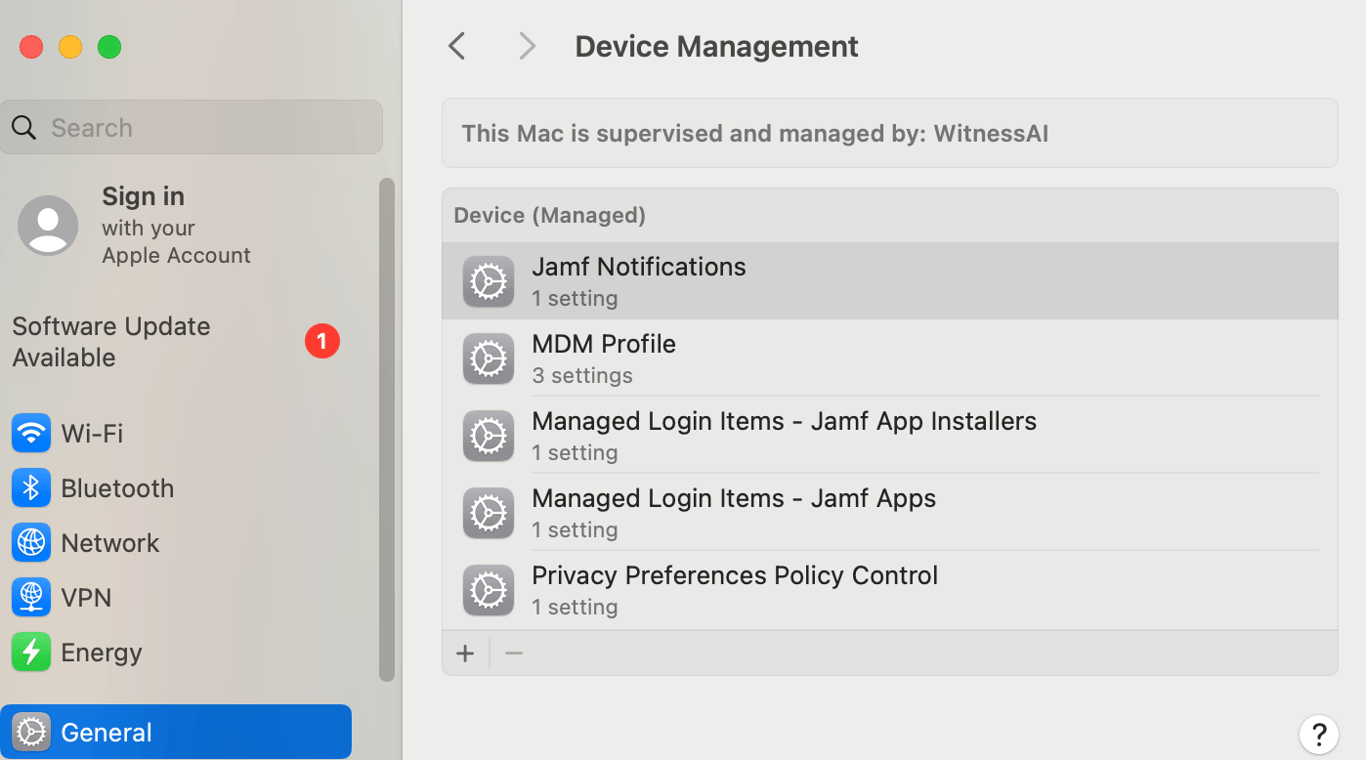
- If the registration is successful, the PAC Profile should be visible under Settings > General > Device Management
- The device should now be PAC ready and AI traffic should be routed via WitnessAI Proxy.
PAC Flush
PAC files can be removed from a User Device by following the below steps:
- Remove the User from the Static User Group used for pushing the registration script
Navigate to Users > Static User Groups and open the Witness-PAC-Users group.
Under the Assignments tab, Click on Edit and remove the User and save it.
- Create a new User Group under Users > Static User Groups.
Give the Display name as Flush-PAC and add the offboarded user account under Assignments Tab.
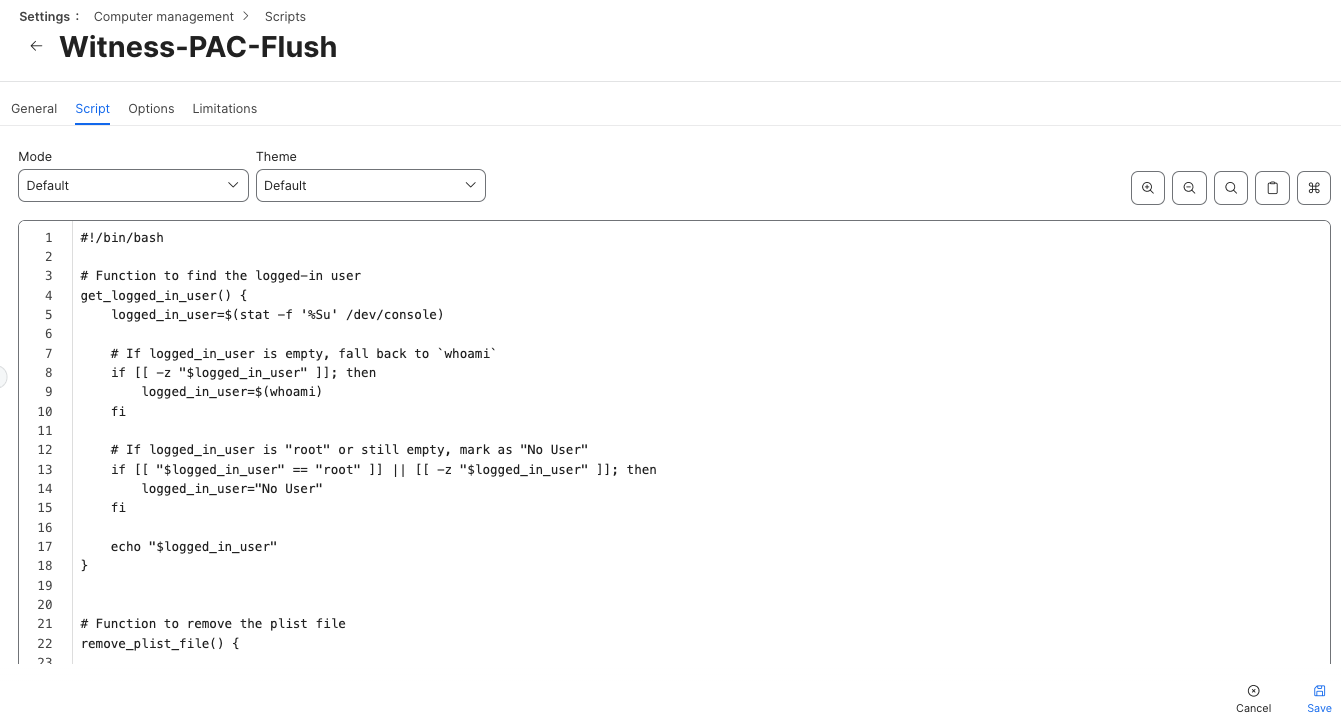
- Navigate to Settings > Computer management > Scripts and Click on New
Enter the below details and save it:
Display Name: Witness-PAC-Flush
- Paste the Flush script downloaded from the UI in Step-1 under the script tab.
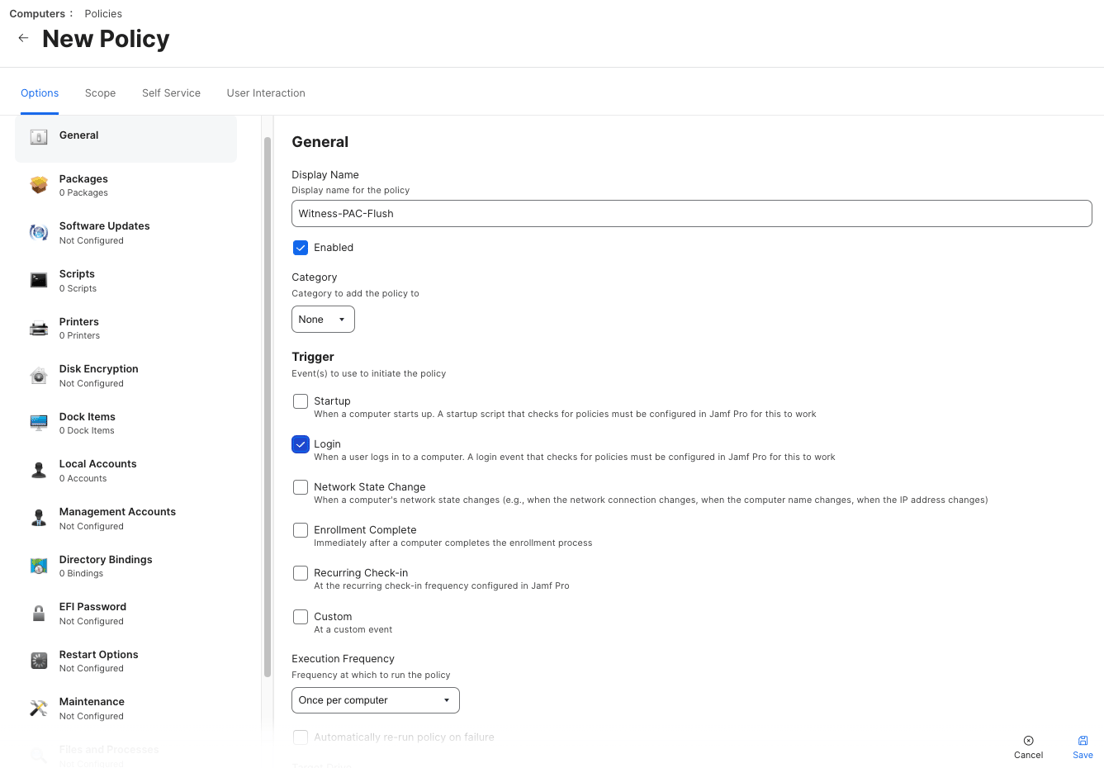
- Navigate to Computers > Policies and click on New
- In General Section:
- Give the Display Name as Witness-PAC-Flush
- Trigger: Login
[Note: A login event that checks for policies must be configured in Jamf Pro for this to work]
- Click on Scripts Section Under Options and then Click on Configure.
- Click on the Add button for Witness-PAC-Flush Script.
- Now Click on the Scope Tab on the Top and click on Add
Select User Groups and Add the PAC-Flush group and click Save.
- The registration script will now be pushed to the target macOS devices and will be run during next device login.
- Once the script run is completed the Proxy PAC Profile will be removed from the device in 2 minutes.
- Settings > Computer management > Check-in
- Click on Edit and Check the below items:
- Create login events
- Check for policies triggered by login
 Made with Bullet